Introduction
Making your own gelatina casera paso a paso at home is easier than you might think. Unlike store-bought versions loaded with artificial colors and preservatives, homemade gelatin lets you control every ingredient — from sweetness to flavor intensity. In this guide, you’ll learn everything about preparing a smooth, colorful, and flavorful gelatin that looks as good as it tastes. We’ll explore what gelatin is, the best ingredients to use, exact proportions, and some professional tricks to make it set perfectly every time. Whether you’re making it for your family, a party, or even to sell, this detailed step-by-step guide will turn you into a true gelatin pro.
Learn more about the health benefits of natural gelatin here: Beneficios y usos de la gelatina natural.
Table of Contents
What is homemade gelatin and why make it yourself
What exactly is gelatin?
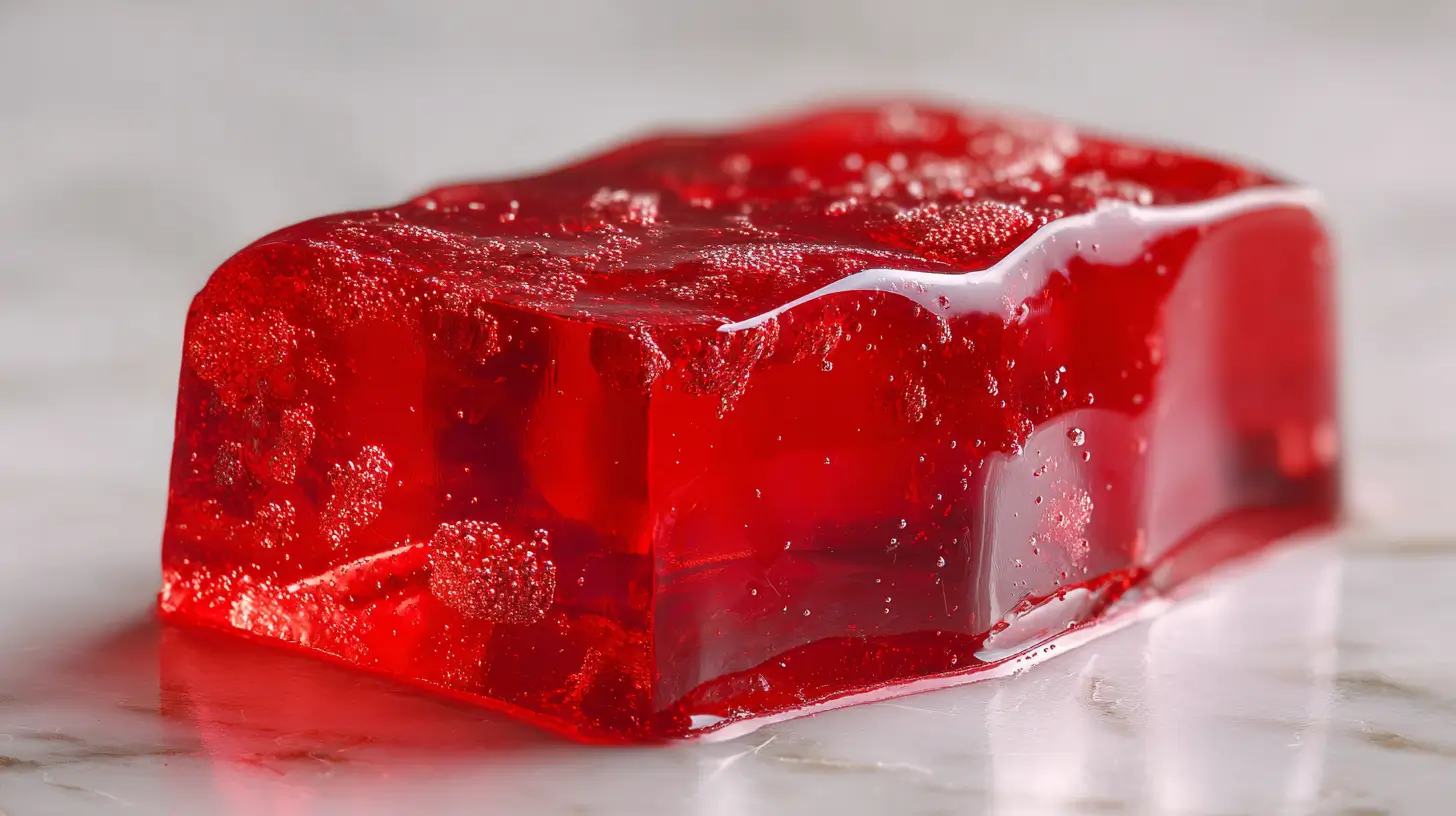
Gelatin is a natural thickening agent made from collagen, a protein found in animal bones and connective tissue. When dissolved in hot water and cooled, it forms a jelly-like texture that’s perfect for desserts. For centuries, people have used it to make sweets, jams, and even savory aspics. Making gelatina casera paso a paso allows you to appreciate the simplicity and science behind this classic ingredient.
Homemade gelatin vs. store-bought gelatin
Most commercial gelatins come in packets that include colorants, artificial sweeteners, and chemical stabilizers. While convenient, they often lack the natural flavor and nutrients you can get from fresh ingredients. Homemade gelatin, on the other hand, gives you full control. You can make it healthier, more flavorful, and tailor it to your taste—using real fruit juices, honey, or even plant-based alternatives like agar-agar.
| Feature | Homemade Gelatin | Store-Bought Gelatin |
|---|---|---|
| Ingredients | Natural fruits, water, sugar, colapez | Artificial flavors, dyes, preservatives |
| Taste | Fresh, customizable | Synthetic, often too sweet |
| Texture | Smooth and soft | Rubber-like |
| Nutrition | High in protein and collagen | Usually low nutritional value |
Benefits of natural gelatin
Making gelatin at home doesn’t just satisfy your sweet tooth — it also benefits your body. Natural gelatin supports joint health, strengthens nails, and improves skin elasticity thanks to its collagen content. It’s light, easy to digest, and suitable for both kids and adults. If you choose to use pure gelatin powder or colapez, you’ll also be avoiding additives and chemicals found in most commercial desserts.
Another reason to prepare it yourself? You can adjust sweetness, add vitamin-rich fruits, and even create stunning layered designs that look amazing on your dessert table.
Basic ingredients to make gelatina casera paso a paso
Essential ingredients for simple homemade gelatin
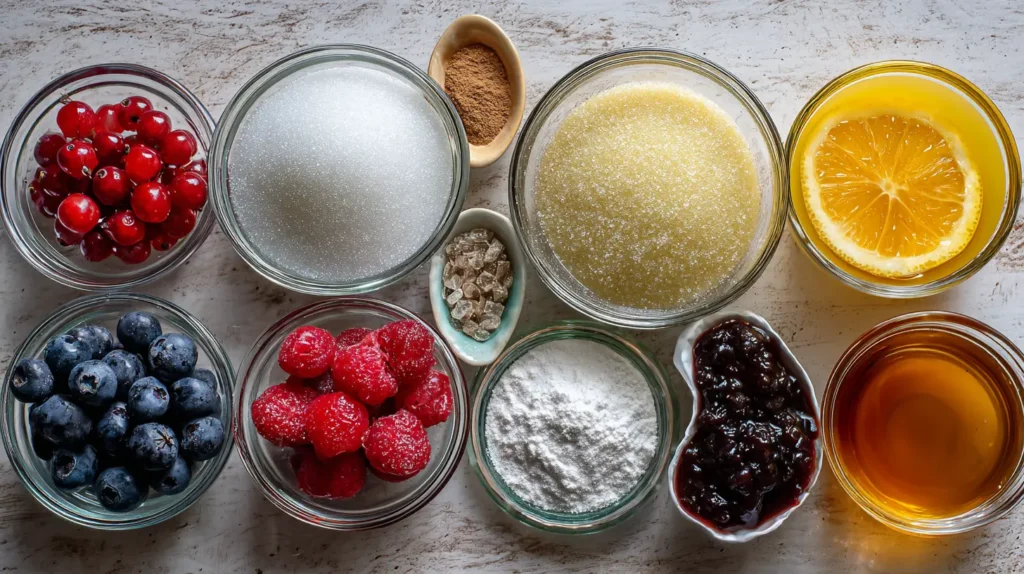
To make gelatina casera paso a paso, you only need a few basic ingredients — most of which you probably already have at home. The standard recipe includes:
- Unflavored gelatin (gelatina sin sabor) or colapez – This is what makes your mixture firm and jelly-like.
- Water – Used both for hydrating and dissolving the gelatin.
- Sugar or sweetener – Adjust to your taste.
- Natural juice or fruit puree – The key to getting delicious flavor and color.
- Optional extras – Like vanilla extract, lemon zest, or pieces of fresh fruit to add texture and visual appeal.
The magic happens when the gelatin powder absorbs the water, swells, and then melts into the warm liquid. Once cooled, it solidifies into that smooth, bouncy texture we all love.
How to choose high-quality ingredients
Choosing the right ingredients makes all the difference in your gelatina casera paso a paso. Use filtered water to avoid any unwanted aftertaste, and fresh, natural juices instead of artificial syrups. For the gelifying agent, always go for unflavored gelatin that’s 100% pure or high-grade colapez. This ensures clarity and firmness without lumps.
If you’re making a fruit-based gelatin, pick fruits that complement your flavor. Citrus, berries, mango, and pineapple (cooked first) work beautifully. Avoid raw pineapple or kiwi, as their enzymes can prevent the gelatin from setting properly.
| Ingredient Type | Best Option | Tip |
|---|---|---|
| Gelatin | Pure unflavored gelatin or colapez | Hydrate before heating |
| Liquid | Fresh fruit juice or infused water | Avoid processed juices |
| Sweetener | Sugar, honey, or stevia | Adjust to taste |
| Flavor enhancer | Vanilla or citrus zest | Add while warm |
| Fruit pieces | Berries, mango, cooked pineapple | Coat lightly in sugar before adding |
Healthy alternatives for sugar-free homemade gelatin
If you’re aiming for a healthier dessert, there are plenty of options to make gelatina casera saludable without refined sugar. Try these substitutions:
- Honey: Adds a natural, floral sweetness and helps preserve freshness.
- Stevia: Zero-calorie sweetener perfect for diabetic-friendly recipes.
- Maple syrup or agave nectar: Great for vegan or plant-based variations.
- Fruit puree: Adds body, flavor, and natural sugars that eliminate the need for added sweeteners.
For color, skip synthetic dyes and use beet juice for red, mango for yellow, or blueberry for purple tones. Not only do they look stunning, but they’re also packed with antioxidants.
When you prepare gelatina casera paso a paso, these small adjustments make your dessert not just beautiful and tasty, but also a nourishing treat for the whole family.
Tools and preparation before making gelatina casera paso a paso
Basic tools you’ll need at home
Before you start preparing your gelatina casera paso a paso, make sure you have the right tools ready. You don’t need fancy kitchen gear — just a few essentials:
- Medium saucepan – for heating the liquid and dissolving the gelatin evenly.
- Mixing bowl – to hydrate and mix ingredients.
- Whisk or silicone spatula – helps dissolve lumps and blend flavors.
- Measuring cups and spoons – accuracy matters for a perfect set.
- Molds or glass containers – choose shapes and sizes depending on your serving style.
If you plan to make layered gelatin, prepare several molds to work in batches. Silicone molds make unmolding easier, while glass dishes give a beautiful presentation if you’re serving directly.
How to prepare the mold and prevent sticking
Getting your gelatin out of the mold in one smooth piece is often the hardest part — but it doesn’t have to be. To keep your gelatina casera paso a paso looking flawless:
- Lightly grease the mold with a few drops of neutral oil (like canola or coconut) and wipe off the excess with a paper towel.
- Rinse with cold water before pouring the mixture. The thin water film helps release it later.
- Let the gelatin cool before refrigerating — if it’s too hot, condensation may affect the texture.
- Refrigerate for at least 4 hours or overnight before unmolding.
- To unmold, briefly dip the mold’s base in warm water for 5–10 seconds, then gently loosen the edges with a knife.
These steps guarantee your gelatin will hold its shape and shine every time.
Hygiene and handling of fresh ingredients
Cleanliness is crucial when making gelatina casera paso a paso, especially if you’re adding fresh fruit or planning to sell your creations. Always:
- Wash fruits thoroughly and peel if needed.
- Sanitize your work surfaces and utensils before starting.
- Use gloves when handling food for commercial batches.
- Store leftovers properly — gelatin should always be refrigerated and consumed within 5–7 days.
Avoid adding raw fruit directly into hot gelatin mixtures, as it can ferment or separate later. Let your base cool slightly before adding fruit chunks to maintain the best texture and appearance.
Keeping things clean and organized from the start ensures a safe, fresh, and professional-looking dessert every time.
Gelatina casera paso a paso – Basic preparation
Step 1 – Hydrate the unflavored gelatin or colapez
The first and most important step in making gelatina casera paso a paso is proper hydration. Whether you’re using powdered gelatin or colapez sheets, this step ensures the right consistency.
- For powdered gelatin: Sprinkle it evenly over cold water (about 1 tablespoon gelatin per 2 cups of liquid). Let it sit for 5 to 10 minutes until it forms a thick, spongy gel.
- For colapez (gelatin sheets): Soak the sheets in cold water for 10 minutes, then gently squeeze out the excess before adding them to the warm liquid.
Avoid dumping gelatin directly into hot water — it will clump and never dissolve correctly. Patience is key here; good hydration is the secret behind a smooth, clear gelatin.
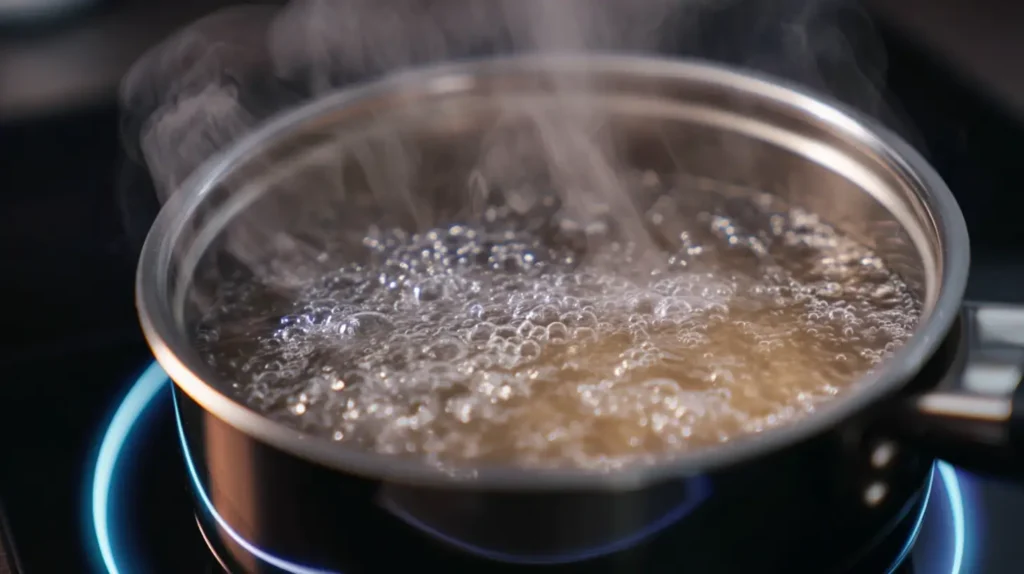
Step 2 – Heat and dissolve the gelatin mixture
Once the gelatin is hydrated, it’s time to melt it into the liquid base. Warm your chosen juice, infusion, or water over low to medium heat — never boil it. When it’s hot but not bubbling, add the gelatin mixture and stir continuously with a whisk or spatula until completely dissolved.
This step is where your gelatin gets its silky texture. You’ll know it’s ready when the liquid looks clear and smooth, with no visible granules.
If you’re preparing a fruit-based gelatina casera, make sure your juice isn’t too acidic; high acidity can weaken gelatin. If you’re using pineapple or kiwi juice, lightly cook it first to deactivate enzymes that prevent setting.
Step 3 – Add flavor, color, and pour into molds
Now comes the fun part — adding personality to your gelatina casera paso a paso. You can use:
- Natural fruit juices for color and flavor (like mango, strawberry, or lime).
- Spices or extracts such as vanilla, cinnamon, or lemon zest for aroma.
- Fruit chunks for texture — just make sure they’re dry and at room temperature before adding.
Mix everything gently, then pour the warm liquid into your molds. Use a ladle to avoid bubbles and spills. Let it cool slightly at room temperature, then transfer it to the refrigerator. Chill for at least 4 hours or overnight.
Once firm, unmold and admire your creation. You’ll have a gelatina casera paso a paso that’s colorful, glossy, and perfectly set — proof that a little patience pays off.
Looking for more gelatin inspiration?
Learn how to make gelatin without flavoring and discover creative ways to personalize your recipes at home.
Creative variations – How to make homemade gelatin without store-bought packets
Recipes using agar-agar or natural pectin
If you want to make gelatina casera paso a paso without using traditional gelatin, there are excellent natural substitutes. Two of the most popular are agar-agar and pectin.
- Agar-agar comes from seaweed and is completely plant-based, perfect for vegetarians and vegans. It sets more firmly than regular gelatin and doesn’t melt as easily at room temperature. To use it, dissolve 1 teaspoon of agar powder per 2 cups of liquid, boil for one minute, then pour into molds.
- Pectin, extracted from fruits like apples and citrus, is another natural thickener. It creates a softer texture and pairs wonderfully with fresh fruit purees or juices. You’ll need to mix it with sugar and boil the mixture briefly before letting it cool.
Both alternatives give you that wobbly, satisfying consistency — just without animal-derived products. It’s an easy swap that still keeps the fun and flavor of homemade gelatin.
How to make healthy homemade gelatin
Turning your dessert into a nutritious treat is easier than it sounds. A gelatina casera saludable focuses on fresh, whole ingredients and skips processed additives. Here’s how to do it:
- Replace refined sugar with honey, agave syrup, or stevia.
- Use natural fruit juices like orange, mango, or watermelon instead of flavored powders.
- Add vitamin-rich fruits (berries, kiwi, papaya) for a boost of color and nutrients.
- Try collagen powder for extra protein benefits.
Homemade gelatin isn’t just a light dessert; it’s also great for skin, nails, and digestion. Plus, kids love the bright colors and fun shapes, so it’s a win-win for the whole family.
When you make your own gelatina casera paso a paso, you know exactly what goes into it — and that’s the real secret to making a dessert that’s both delicious and wholesome.
How to prepare homemade gelatin with colapez step by step
Colapez, often used in Latin American recipes, gives gelatin a smooth, glossy texture and slightly firmer body compared to powdered versions. Here’s how to make gelatina casera con colapez like a pro:
- Hydrate the colapez sheets in cold water for about 10 minutes.
- Warm your liquid base (juice, milk, or infusion) without boiling.
- Squeeze out the water from the hydrated sheets and dissolve them in the warm liquid, stirring until clear.
- Add your flavoring (vanilla, fruit puree, etc.) and sweeten to taste.
- Pour into molds and refrigerate for at least 4–5 hours.
Colapez results in a transparent, elegant gelatin perfect for cakes, fruit cups, or special desserts for events. It’s the go-to choice for pastry chefs who value precision and presentation.
Pro tip: For colorful layered gelatin, let each layer set for at least 30 minutes before adding the next one. Patience ensures perfect, defined stripes every time.
Exact measurements and proportions for a perfect gelatina casera paso a paso
How much water to use per packet or sheet of gelatin
Getting the right ratio between gelatin and liquid is key to a flawless texture. Too much water makes your gelatina casera paso a paso too soft, while too little turns it rubbery. Here’s a general guide to follow:
| Texture Type | Powdered Gelatin | Colapez (Gelatin Sheets) | Liquid Needed |
|---|---|---|---|
| Soft and light (for desserts) | 1 Tbsp gelatin | 3 sheets | 2 cups liquid |
| Medium firmness (for fruit gelatin) | 1 ½ Tbsp gelatin | 4 sheets | 2 cups liquid |
| Firm (for cake toppings or layered gelatin) | 2 Tbsp gelatin | 5 sheets | 2 cups liquid |
When using natural juices instead of water, reduce the amount slightly (about 10%) since the fruit sugars and fibers affect the setting power.
Always hydrate gelatin in cold water first and never boil the mixture, as heat can destroy its setting ability. These small details make all the difference between a silky dessert and a failed batch.
How to adjust your recipe when using fruit juices or purees
Fruits bring color and flavor to your gelatina casera paso a paso, but they can also change how it sets. Some fruits contain natural enzymes (like pineapple, papaya, or kiwi) that break down gelatin proteins. To avoid this:
- Cook the fruit or juice for 2–3 minutes to deactivate the enzymes.
- Strain the puree to remove excess pulp that can affect consistency.
- Reduce liquid by ¼ cup if your puree is too thick.
For creamy gelatins (like yogurt or milk-based ones), add the gelatin once the liquid has cooled slightly to prevent curdling. Stir constantly for even distribution.
| Type of Base | Adjustment Needed | Notes |
|---|---|---|
| Citrus juice | Add extra ½ Tbsp gelatin | Acidity weakens setting power |
| Fruit puree | Reduce liquid by ¼ cup | Keeps texture firm |
| Milk or yogurt | Cool before mixing | Prevents curdling |
| Flavored syrups | Cut sugar slightly | Balances sweetness |
Common mistakes and how to fix them
Even if you follow your recipe carefully, small mistakes can happen. Here’s how to troubleshoot your gelatina casera paso a paso like a pro:
| Problem | Likely Cause | Solution |
|---|---|---|
| Gelatin didn’t set | Too much liquid or not enough gelatin | Reheat gently, add ½ Tbsp gelatin dissolved in warm water, and chill again |
| Grainy texture | Gelatin not fully dissolved | Heat longer at low temperature and stir constantly |
| Bubbles or foam | Stirred too vigorously | Skim surface before chilling |
| Too sweet | Excess sugar or syrup | Add a few drops of lemon juice next time |
| Sticky mold | Didn’t grease or rinse mold | Lightly oil next time and chill longer before unmolding |
Making mistakes is part of the process — what matters is learning how to adjust. Once you master the right proportions, every batch of gelatina casera paso a paso will come out perfect, smooth, and flavorful.
How to make gelatina casera paso a paso for selling or sharing
Tips for homemade production and proper storage
If you’re thinking about turning your passion for gelatina casera paso a paso into a small business, consistency and hygiene are your best allies. Always prepare your workspace and plan your batches in advance.
Here are key guidelines to follow:
- Use clean and sanitized utensils for every batch.
- Prepare multiple molds so you can rotate while one batch sets in the fridge.
- Keep a cool environment—heat can affect the texture before refrigeration.
- Label and date your containers if you’re storing them for sale.
Homemade gelatin typically lasts 5 to 7 days in the refrigerator if covered tightly. If you’re adding fresh fruit, aim to sell within 3 days for optimal freshness. Avoid freezing gelatin, as it can separate and lose its structure once thawed.
Presentation and decoration ideas
Presentation sells, and with gelatin, looks are everything. You can transform a simple dessert into a showstopper with just a few creative touches.
- Layered gelatin: Alternate colors and flavors for a visual “rainbow” effect.
- Gelatin with fruit: Add colorful fruit pieces like strawberries, kiwi, or mango.
- Molded gelatin cups: Perfect for individual sales at fairs, parties, or cafés.
- Themed molds: Use heart, flower, or star-shaped molds for seasonal events.
To give your gelatina casera paso a paso a professional touch, brush a bit of edible glitter or glaze once unmolded. You can also use transparent cups to show off layers and colors.
Always remember that people eat with their eyes first. A clear, shiny gelatin with vivid colors will instantly grab attention.
How to calculate costs and portions for selling
Selling gelatin is profitable when you understand your costs and portion sizes. Here’s a simple breakdown to help you price your gelatina casera paso a paso competitively:
| Item | Approx. Cost (USD) | Servings per Batch | Cost per Serving |
|---|---|---|---|
| Gelatin powder or colapez | $1.50 | 10 | $0.15 |
| Juice or flavor base | $2.00 | 10 | $0.20 |
| Sugar or sweetener | $0.50 | 10 | $0.05 |
| Packaging (cups, lids, labels) | $1.00 | 10 | $0.10 |
| Total per batch | $5.00 | 10 servings | $0.50 |
If you sell each serving for $1.50, your profit margin is around 200%—not bad for a simple homemade dessert!
For best results:
- Buy ingredients in bulk to lower costs.
- Keep consistent flavor options (strawberry, mango, lemon).
- Offer mixed packs for events or parties.
With creativity and attention to detail, your gelatina casera paso a paso can become not just a delicious treat, but a profitable business venture.
Discover more creative techniques to customize your gelatin recipes here: How to make gelatin without flavor.

Professional tricks to make your gelatina casera paso a paso set faster
How to cool gelatin correctly without ruining the texture
Patience is important when preparing gelatina casera paso a paso, but there are safe ways to speed up the setting process without compromising quality. The biggest mistake people make is putting hot gelatin directly into the freezer — this causes ice crystals and a grainy texture. Instead, try this:
- Let the gelatin mixture cool at room temperature for 10–15 minutes.
- Place the container in a bowl filled with ice water and stir gently for a few minutes.
- Once the gelatin feels slightly thicker but still pourable, refrigerate it as usual.
This “ice bath method” cuts chilling time by almost half and gives you the same smooth, glossy finish as slow cooling. Never rush the process with extreme cold — gradual cooling preserves clarity and flavor.
How to make gelatin set faster in the refrigerator
There are a few smart tweaks you can apply to make your gelatina casera paso a paso firm up more quickly:
- Use colder liquids from the start (chilled juice or water).
- Increase gelatin slightly — about ½ tablespoon more per batch speeds up setting.
- Avoid large molds; smaller portions cool and set faster.
- Keep the refrigerator door closed during the first two hours to maintain a steady temperature.
If you’re preparing layered gelatin, speed up the process by pouring each new layer when the previous one is almost firm. That way, the layers stick together seamlessly but remain defined.
| Tip | Effect | Notes |
|---|---|---|
| Ice bath method | Cuts time in half | Best for single-flavor gelatin |
| Use chilled juice | Reduces cooling time | Avoid frozen liquids |
| Smaller molds | Faster firming | Ideal for sales |
| Steady fridge temp | Improves texture | Don’t open the door frequently |
How long does it really take for gelatin to set?
Under normal conditions, your gelatina casera paso a paso will take 4–6 hours in the refrigerator to set completely. Factors like room temperature, mold size, and ingredient density can affect this time.
- Small individual cups: 2–3 hours.
- Medium molds (1–2 cups): 4 hours.
- Large decorative molds: 6–8 hours or overnight.
To check readiness, gently touch the surface — it should be firm and springy. If it’s sticky or leaves residue on your finger, give it more time. Remember, it’s better to wait a little longer than to unmold too soon and ruin your perfect shape.
By following these professional tricks, you’ll save time and still achieve a flawless texture every single time. Your gelatina casera paso a paso will look elegant, taste refreshing, and be ready to serve faster than you thought possible.
Frequently Asked Questions about gelatina casera paso a paso (FAQs)
What is the procedure for making gelatin?
The basic procedure for making gelatina casera paso a paso involves three main stages: hydrating, dissolving, and chilling.
Hydrate the unflavored gelatin or colapez in cold water until it softens.
Dissolve it completely in warm liquid (juice, milk, or water) without boiling.
Pour and chill the mixture in molds until firm.
Depending on your recipe, you can add fruits, colors, or natural sweeteners to personalize your gelatin. The process is simple, but precision and patience guarantee professional results every time.
How is gelatin made?
Commercial gelatin is produced from collagen, a natural protein found in animal connective tissue. However, when you make gelatina casera paso a paso, you can skip the industrial additives and work with pure gelatin or plant-based alternatives like agar-agar or pectin.
Homemade gelatin starts with a liquid base — usually fruit juice — mixed with a gelling agent and sweetener. Once hydrated and dissolved, the mixture is cooled to form that classic wobbly, translucent dessert everyone loves.
How can I make gelatin set faster?
To help your gelatina casera paso a paso set more quickly, use chilled liquids, smaller molds, and slightly increase the amount of gelatin. You can also use the ice bath method — place the warm mixture over a bowl of ice water and stir until it thickens slightly before refrigerating.
Avoid putting it directly in the freezer; sudden freezing can ruin the texture and make it grainy. On average, gelatin takes 4–6 hours to fully set in the fridge, but these tricks can cut that time in half.
Is gelatin good or bad for your health?
Natural gelatin, when made at home, is generally good for your health. It’s rich in collagen, which supports joint health, skin elasticity, and digestive function. Plus, it’s low in calories and fat-free, making it a great light dessert option.
However, some commercial gelatins contain artificial colorings and high amounts of sugar, which can reduce their nutritional value. By making gelatina casera paso a paso with natural juices and sweeteners, you get a tasty treat that’s both healthy and satisfying.
For more insights, check out this article on the benefits of natural gelatin: Beneficios y usos de la gelatina natural.
For more insights, check out this article on the benefits of natural gelatin: Beneficios y usos de la gelatina natural.
Conclusion: Enjoy your gelatina casera paso a paso like a pro
Summary of key benefits and steps
By now, you’ve learned everything you need to master gelatina casera paso a paso — from choosing the right ingredients to achieving the perfect texture. This simple dessert is more than a childhood favorite; it’s a creative, customizable, and healthy option that adapts to any occasion.
Homemade gelatin lets you experiment with colors, flavors, and shapes while avoiding artificial additives. Whether you’re making it for your family or planning to sell it, the process stays easy, fun, and rewarding.
Experiment and create your own versions
Don’t be afraid to try new ideas. Mix fruit juices, layer vibrant colors, or use natural ingredients like agar-agar for vegan alternatives. Every batch is a chance to express creativity in the kitchen.
If you want to dive deeper into gelatin recipes, don’t miss our guide on Beneficios y usos de la gelatina natural to learn more about the health properties of this amazing ingredient.
Print
Gelatina casera paso a paso: cómo hacer la receta perfecta desde cero
- Total Time: 4 hours 30 minutes
- Yield: 10 porciones 1x
Description
Aprende a preparar una deliciosa gelatina casera con ingredientes simples y naturales. ¡Perfecta para cualquier ocasión!
Ingredients
- 1 cucharada de gelatina sin sabor o 3 hojas de colapez
- 2 tazas de jugo natural de frutas o agua
- ½ taza de azúcar, miel o stevia
- Opcional: extracto de vainilla, ralladura de limón, trozos de fruta
Instructions
- Hidratar la gelatina en agua fría durante 5 minutos.
- Calentar suavemente la base líquida y disolver completamente la gelatina.
- Agregar el endulzante y los sabores opcionales.
- Verter en moldes y refrigerar por al menos 4 horas.
Notes
Usa frutas frescas para aportar color y dulzor natural. Evita piña o kiwi crudo para asegurar que la gelatina cuaje bien.
- Prep Time: 20 minutes
- Cook Time: 10 minutes
- Category: Postre
- Method: Refrigerado
- Cuisine: Latinoamericana
Nutrition
- Serving Size: 1 porción
- Calories: 70
- Sugar: 10g
- Sodium: 5mg
- Fat: 0g
- Saturated Fat: 0g
- Unsaturated Fat: 0g
- Trans Fat: 0g
- Carbohydrates: 12g
- Fiber: 0g
- Protein: 1g
- Cholesterol: 0mg
Keywords: gelatina, casera, postre, frutas, receta fácil